
Before you even think about plugging in formulas, the most critical part of an effective Excel order form is getting the layout right. A clean, logical structure is the foundation for everything that comes next. Think of it as the blueprint for an efficient workflow—one that’s intuitive for customers to fill out and dead simple for your team to process.
Designing a User-Friendly Order Form Layout
A well-designed form is your first line of defense against confusion and data entry errors. The trick is to organize all the information into distinct, logical blocks. When someone opens that file, they should know exactly where to put their details, what they’re ordering, and how the final cost is calculated. No guesswork involved.
This isn’t just about making things look pretty; it's a functional necessity. A clear layout guides the user through the process, drastically cutting down on manual errors and saving everyone a ton of time.
Core Sections of Your Excel Order Form
To build a solid layout, I always start by mapping out three primary sections. Each one serves a very specific purpose in the order process.
- Customer Information: This is where you capture all the essential details about the buyer. Non-negotiable fields here include their name, company (if it’s a B2B order), shipping and billing addresses, email, and a phone number. Clear labels are a must.
- Order Details: This block is for all the transactional info. You absolutely need an Order ID for unique tracking, an Order Date, and maybe a spot for the salesperson's name or specific payment terms.
- Itemized Product List: This is the heart of the form where the actual products or services get listed. It needs a clean, table-like structure with very specific column headers, which we'll get into next.
The goal is to create a visual flow that makes the form easy to scan and complete in seconds. For a deeper dive into creating intuitive layouts, you can learn more about general form design best practices in our comprehensive guide.
This simple flowchart breaks down the fundamental flow of information into those three logical stages.
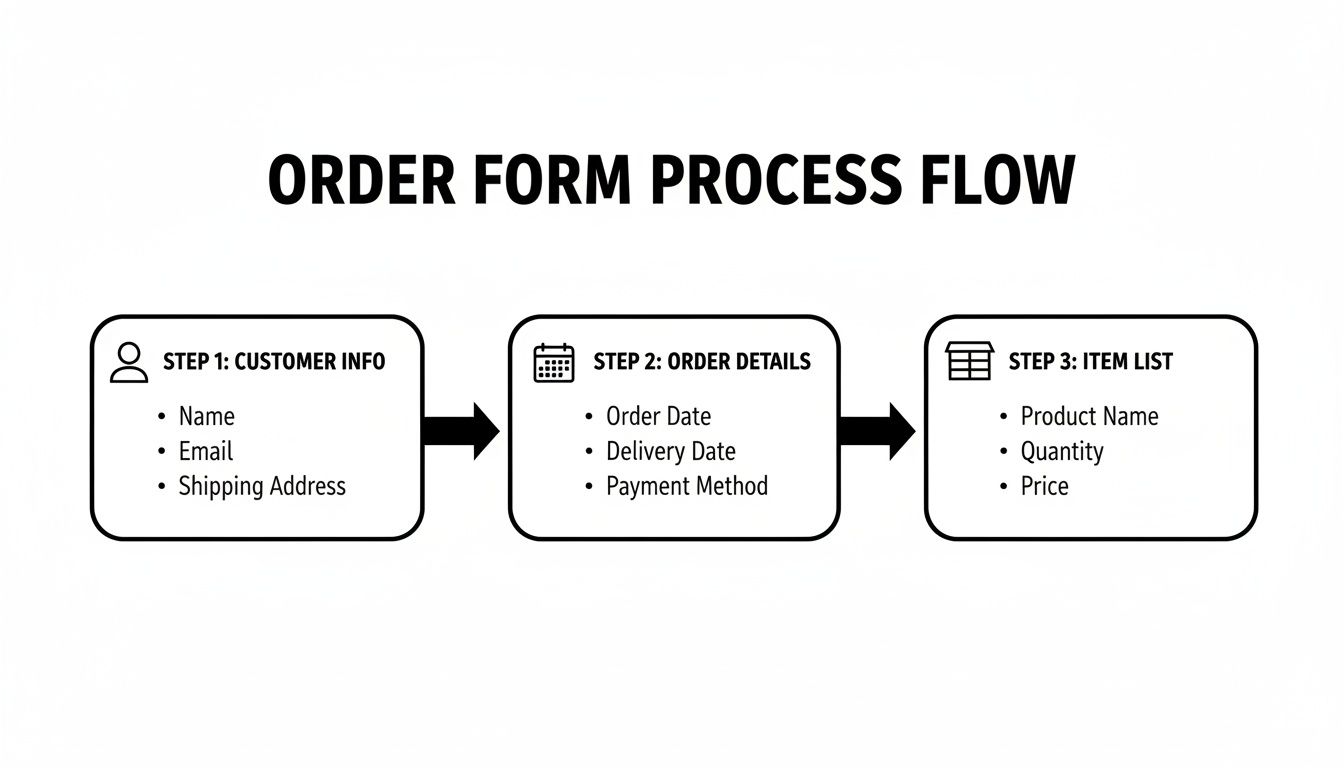
Starting with the customer and order info before getting into the nitty-gritty of the item list just makes sense. It’s a natural progression from who is ordering to what they are ordering.
Structuring the Itemized List
The itemized list is where accuracy is everything. I’ve seen firsthand how a poorly structured list leads directly to calculation errors and massive fulfillment headaches down the line.
Your column headers are the foundation for all your automated calculations. Get them right from the start, and every formula you add later will work perfectly. Don't rush this step.
Here are the critical headers your itemized table should include:
- Item ID/SKU: A unique identifier for each product.
- Description: A clear, concise description of the item.
- Quantity: The number of units being ordered.
- Unit Price: The cost of a single item.
- Line Total: The calculated amount (which will be Quantity × Unit Price).
The table below breaks down these core components, their purpose, and some recommended Excel formatting to make your form function smoothly.
Core Components of an Excel Order Form
| Field Category | Essential Field | Purpose | Recommended Excel Format |
|---|---|---|---|
| Customer Info | Name | To identify the customer. | General |
| Customer Info | Shipping Address | To know where to send the goods. | Text |
| Customer Info | For communication and digital receipts. | General | |
| Order Details | Order ID | A unique number for tracking. | Text (to allow for prefixes like "ORD-") |
| Order Details | Order Date | To record when the order was placed. | Date (e.g., MM/DD/YYYY) |
| Itemized List | Item ID/SKU | For accurate inventory management. | General or Text |
| Itemized List | Quantity | To specify the number of units. | Number (no decimals) |
| Itemized List | Unit Price | The price per single item. | Currency ($) |
| Itemized List | Line Total | To calculate the subtotal for each item. | Currency ($) (Formula-driven) |
Getting these fields and formats right from the beginning will save you countless headaches when you start adding formulas and automation.
While this guide is focused on creating order forms from scratch, the principles of a good layout are universal. If you're looking for more inspiration, it can be helpful to explore various free Excel receipt templates. They often showcase clever formatting and structural ideas you can easily adapt for your own order form.
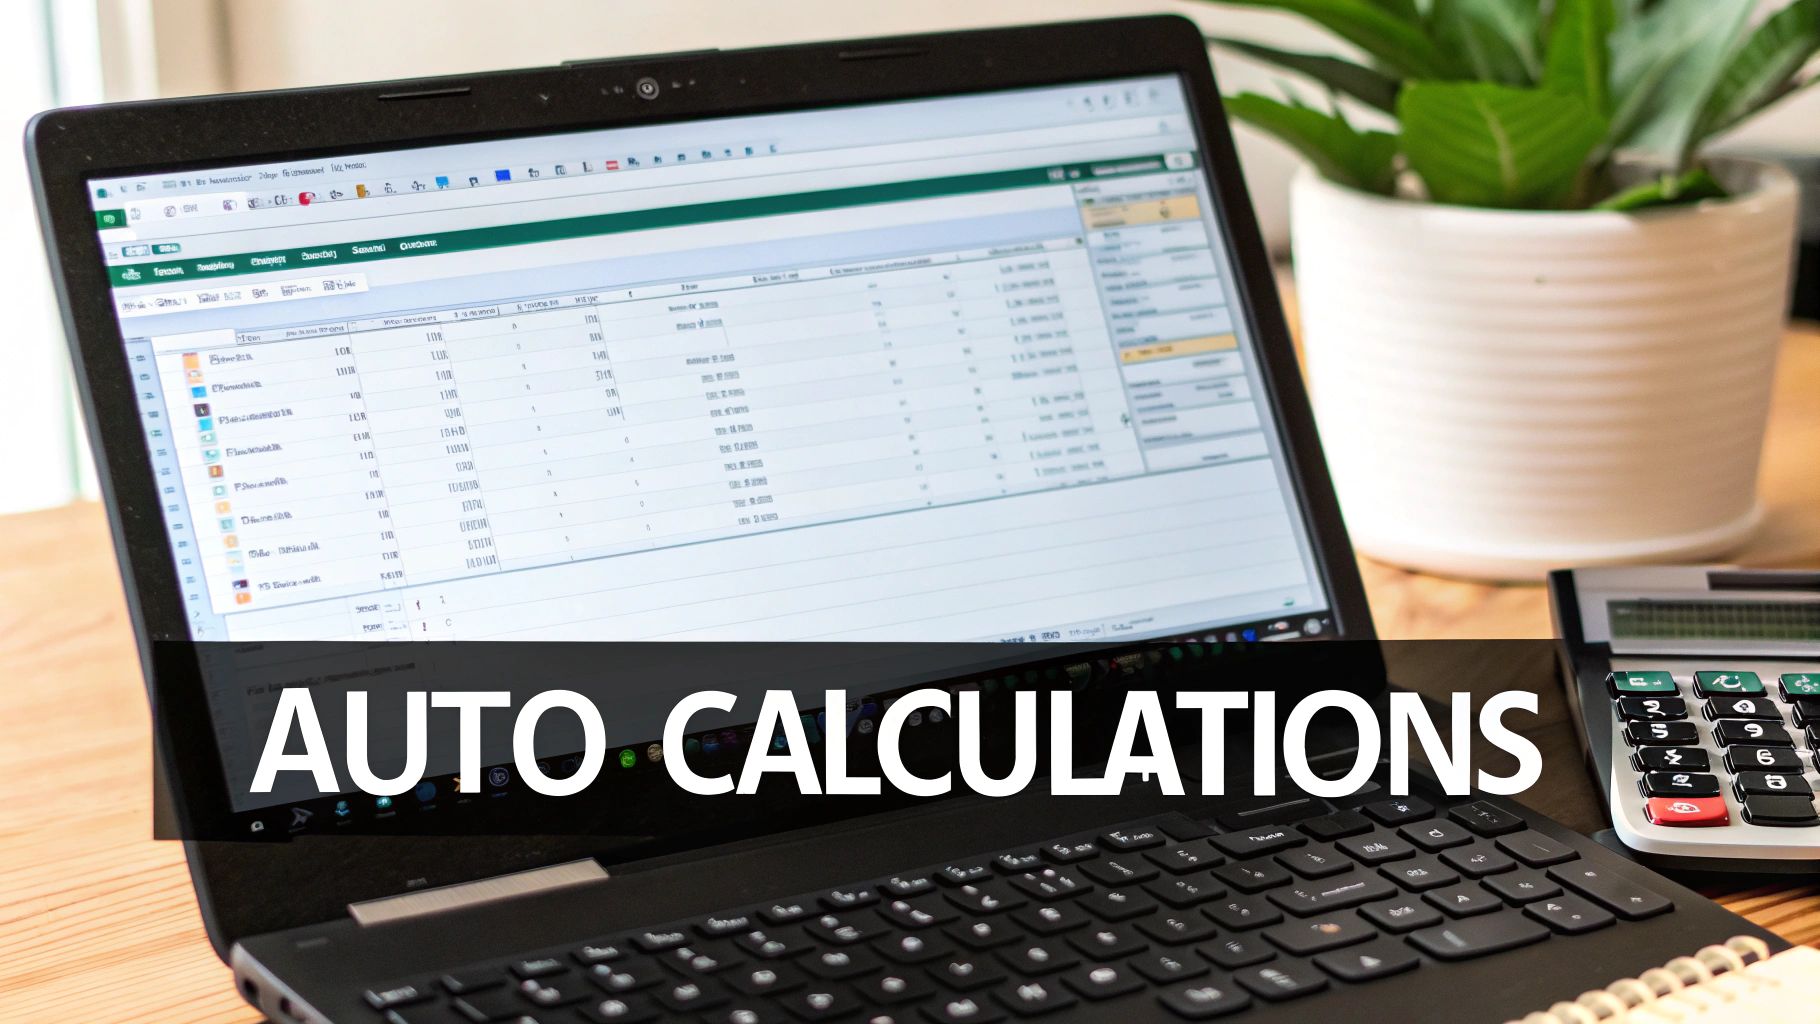
Using Formulas to Automate Your Calculations
This is where your static spreadsheet starts to feel like a smart, dynamic tool. By plugging in a few key formulas, you get rid of manual math, slash the risk of costly errors, and speed up the whole order process. Honestly, this is the step that turns a simple grid into a genuine business asset.
The magic starts with basic multiplication. For each item on your order form, you need a line total, which is just the quantity multiplied by the unit price. If your quantity is in cell C12 and the unit price is in D12, the formula is as simple as =C12*D12. Pop that into the line total cell, then just click and drag the little square at the corner of the cell to copy that formula all the way down your items column.
Calculating Subtotals, Taxes, and Discounts
Once you have all your line totals, the next job is adding them up for a subtotal. This is a perfect job for the SUM function. Just click the cell where you want the subtotal to live and type in a formula like =SUM(E12:E20), assuming your line totals are in that E column range. Excel will automatically add up everything in those cells for a clean, pre-tax total.
From there, you can start layering on the other important numbers:
- Sales Tax: I find it's best to have a dedicated cell for your tax rate (say, 7.5%). If your subtotal is in E21 and your tax rate is in G21, the tax amount is calculated with
=E21*G21. - Discounts: This works just like the tax calculation. If you're giving a 10% discount, the formula would reference the subtotal:
=E21*10%. - Final Total: And now for the grand finale—the final amount due. This formula just pulls everything together:
=Subtotal + SalesTax - Discount.
Setting it up this way ensures that every calculation is totally transparent and, best of all, updates automatically anytime you change a quantity or a price.
Polishing Your Form with IFERROR
An empty order form can look pretty unprofessional when it's littered with ugly error messages like #DIV/0! or #VALUE! in your formula cells. You can clean this up in seconds with the IFERROR function.
Wrapping your formulas in
IFERRORis a small touch that makes a huge difference in professionalism. It tells Excel, "If this calculation results in an error, just show a blank cell or zero instead."
For example, your line total formula can be upgraded to =IFERROR(C12*D12, ""). This just means that if cells C12 or D12 are empty, the total cell will stay blank instead of flashing an error.
It's no surprise that so many businesses start with DIY Excel forms. You'll find YouTube tutorials on advanced setups with millions of views. But there's a catch. Statistics show that while 82% of SMBs in major markets start with Excel for sales, only 23% manage to scale past 100 orders a month without custom code. Many face a 37% abandonment rate from forms that have become too clunky and complex.
As your business grows, you'll likely want to connect your spreadsheet data to other tools. For instance, a great next step is learning how to convert a Google Sheet into a user-friendly form, which can really streamline how you collect information in the first place.
Adding Dropdowns and Data Validation to Prevent Errors
Once you've got your formulas humming along, the next big leap forward is stopping human error before it even happens. Let's be honest: manual data entry is where most mistakes creep in, leading to messed-up orders and a lot of wasted time fixing things later.
This is where Excel's Data Validation feature becomes your secret weapon. It’s how you transform free-for-all text fields into controlled, error-proof inputs that guide people to do the right thing. Imagine never having to fix a typo in a product name again, or ensuring no one can accidentally type "two" instead of the number 2 in the quantity column. It’s all about keeping your data clean from the get-go.
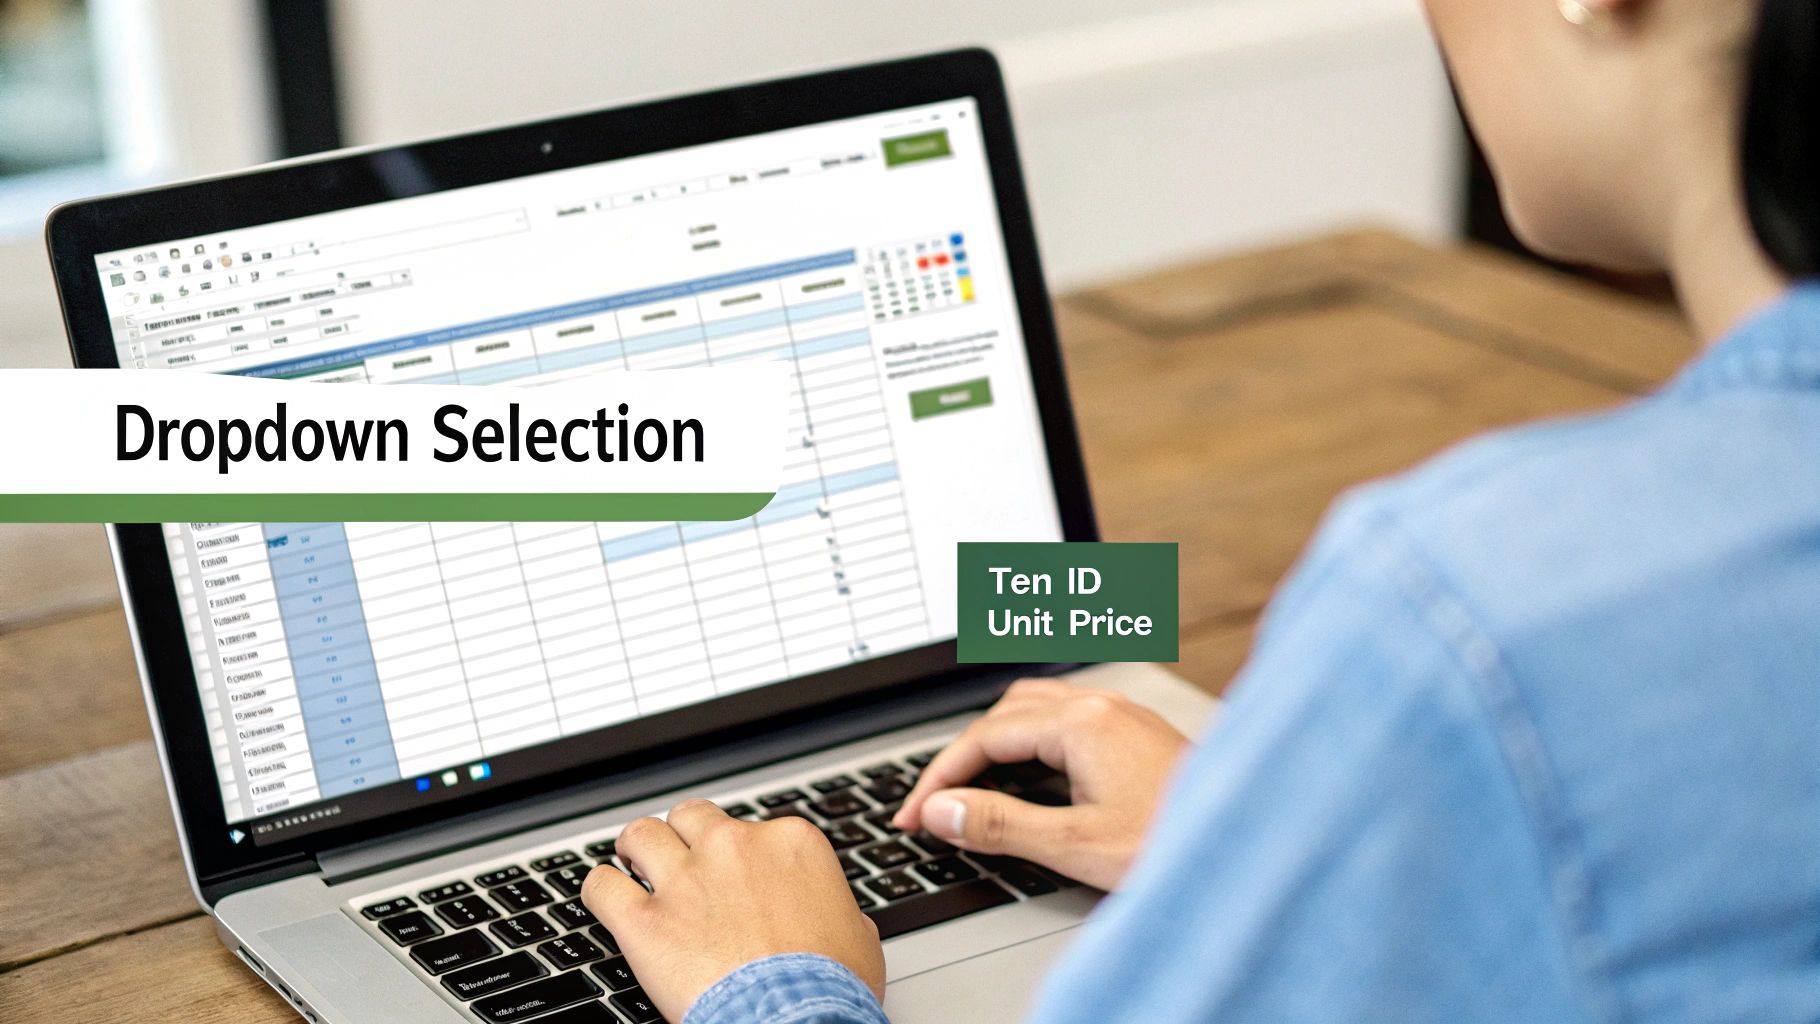
Creating Product Selection Dropdowns
One of the most powerful and professional touches you can add is a dropdown list for product selection. This single change gets rid of spelling mistakes and makes sure people can only pick from your actual, official product catalog. It just makes the whole form feel more polished and easier to use.
Setting this up is pretty straightforward. First, create your master list of products on a separate sheet—let's call it "Products" for simplicity. Just list all your item names in a single column.
Now, jump back to your main order form sheet:
- Click and drag to select all the cells where someone will choose a product (for instance, the entire 'Description' column in your line items table).
- Head up to the Data tab in the Excel ribbon and find the Data Validation button.
- A dialog box will pop up. Under the 'Allow' dropdown, pick List.
- In the 'Source' box, click the little arrow icon. Now, navigate over to your "Products" sheet and select the entire range of your product names.
Hit OK, and that's it. Those cells now have a handy dropdown arrow, locking the choices to your official list.
Linking Dropdowns for Auto-Populated Data
A dropdown is cool, but the real magic happens when you link it to other cells to auto-populate data like the 'Item ID' or 'Unit Price'. This is where a lookup formula like VLOOKUP or the more modern INDEX/MATCH combo comes into play.
Let's say a user picks a product in cell B12. You can pop this formula into the 'Unit Price' cell (D12) to automatically pull in the correct price from your "Products" sheet:
=IFERROR(VLOOKUP(B12, Products!A2:B100, 2, FALSE), "")
This formula looks for the product name from B12 in your master product list, grabs the price from the second column of that list, and—this is a nice touch—leaves the cell blank if nothing is selected yet, thanks to the IFERROR function.
By linking dropdowns to lookup formulas, you create a dynamic system where one selection instantly fills in multiple related fields. This not only saves time but also guarantees that your pricing and product data are always 100% accurate.
Enforcing Rules on Other Fields
Data Validation is so much more than just dropdown lists. You can apply all sorts of rules to other fields to make your form practically foolproof.
Here are a few real-world examples I use all the time:
- Quantity: Set the 'Quantity' column to only accept whole numbers that are greater than zero. No more accidents or weird entries.
- Dates: Make sure the 'Order Date' field will only accept a valid date format.
- Text Length: You could limit an 'Order ID' field to a specific number of characters to keep your numbering system consistent.
Every little rule you add makes your form more robust and less susceptible to the tiny mistakes that can snowball into big headaches. If you're looking to build even smarter tools for data collection, our guide on creating a form builder with validation rules dives deeper into these concepts beyond what's possible in a standard spreadsheet.
How to Protect and Finalize Your Template
You’ve done the heavy lifting—the formulas are humming, the dropdowns are working, and the validation rules are ready to catch any mistakes. Your Excel order form is now a smart, automated tool. The final, crucial step is to protect all that hard work.
Without protection, one accidental drag-and-drop or a mistaken key press could wipe out a critical formula, breaking your entire calculation chain. The goal isn't to lock everything down into a digital fortress. It's about being smart and selective. You want to lock down your formulas and headers while leaving the input cells—like customer name, quantities, and contact info—open for business. This creates a foolproof form that anyone can use without needing a PhD in Excel.
Locking Down Formulas and Unlocking Input Cells
Excel's protection feature can feel a bit backward at first. By default, every single cell on a new sheet is already set to "Locked." This setting does absolutely nothing until you flip the master switch and protect the entire sheet. So, our first job is to tell Excel which specific cells shouldn't be locked.
Here's the most straightforward way to do it:
- Select the Editable Cells: Hold down the Ctrl key and start clicking on every single cell where a user will need to type. This means the customer detail fields, the product quantity cells, the notes section—anywhere you expect input.
- Unlock Your Selection: Once they're all highlighted, right-click on any of the selected cells and choose Format Cells. Head over to the Protection tab and simply uncheck the box that says Locked. Click OK.
- Activate Sheet Protection: Now, navigate to the Review tab in the Excel ribbon and click Protect Sheet. A small window will pop up, giving you the option to add a password. You don't always need one, but it’s a great idea if you want to be the only person who can unprotect the sheet to make future changes.
This simple three-step process is the key to making your template usable and durable. It ensures users can only edit the parts they're supposed to, keeping the complex engine you've built safely under the hood.
Saving as a Reusable Excel Template
The very last thing you want is for someone to fill out an order, hit "Save," and accidentally overwrite your beautiful, blank master template. To prevent this nightmare scenario, you need to save your work as an official Excel Template file.
Just go to File > Save As, and in the “Save as type” dropdown menu, choose Excel Template (.xltx).
That's it. This tiny change makes a massive difference. Now, whenever someone opens that file, Excel automatically creates a brand-new, untitled copy. Your original template remains pristine and untouched, ready for the next order.
The impact of using standardized templates like this is huge. Businesses that implement them can slash order processing errors by up to 55%. And don't let anyone tell you Excel is outdated; 73% of sales teams in major markets still lean on it for capturing initial orders, proving its staying power. You can see more data on how standardized forms boost efficiency at ProjectManager.com.
For a deeper look into keeping digital form data safe, be sure to read our complete guide on form security and data protection.
Knowing When to Move Beyond Excel
Your Excel order form is a fantastic starting point—it's accessible, flexible, and surprisingly powerful. For a while, it does the job perfectly. But as your business grows, the very tool that helped you get started can begin to show its cracks.
Recognizing the signs that you’ve outgrown your spreadsheet is the key to scaling your operations without getting bogged down by manual work that just doesn’t make sense anymore.
One of the first red flags is the sheer volume of manual data entry. You might find yourself spending hours every week just consolidating information from multiple Excel files sent by different salespeople. This isn't just time-consuming; it's a recipe for costly mistakes. Without a central dashboard, you have zero real-time visibility into your sales pipeline, making it nearly impossible to forecast inventory or track performance accurately.
This is a classic growing pain. As far back as 2019, small business owners were discussing their daily struggles managing around 30 orders a day with basic Excel forms. Fast forward, and while 68% of small businesses still rely on Excel for order management, a significant 42% report that the resulting data entry errors cost them an average of $5,200 annually per team from issues like overstocking or shortages. You can even see some of these early business challenges on Microsoft's Q&A forums.
The Next Step: AI-Powered Form Platforms
When you hit this ceiling, the natural next step is to look at modern, AI-powered form platforms. These tools are designed specifically to solve Excel’s biggest weaknesses by automating the entire order management process from the moment a customer clicks "submit."
They offer features that spreadsheets simply can't match, like direct CRM integrations, automated workflows that alert your team, and insightful analytics that actually mean something.
Imagine a system where every order submitted online automatically creates a new deal in your CRM, pings your fulfillment team on Slack, and updates your inventory in real-time. That's the power these platforms provide. They eliminate manual consolidation and give you an immediate, accurate view of your entire sales operation.
Eventually, you'll also find Excel limiting for other tasks, like generating dynamic content or publishing product listings from your order data. At that point, you might look into tools that help you create web pages directly from spreadsheet data.
Top Order Form Solutions for Growth Teams
While Excel is a great starting point, modern form builders are built for what comes next. They automate tedious work so your team can focus on what actually matters—growing the business. Choosing the right tool can make all the difference.
To help you navigate the options, here is a comparison of solutions built to help teams scale efficiently. Many of these platforms offer specialized tools to streamline your process; for a deeper look, check out our guide on purchase order management software.
| Tool | Key Feature | Best For |
|---|---|---|
| Orbit AI | AI-powered lead qualification and smart scoring | Teams focused on converting high-quality leads into sales with minimal friction. |
| Jotform | Massive library of templates and extensive integrations | Businesses needing a versatile solution for various data collection needs beyond just orders. |
| Typeform | Conversational, one-question-at-a-time interface | Companies prioritizing user experience and engagement to reduce form abandonment. |
| Google Forms | Free and simple integration with Google Sheets | Startups and small businesses looking for a basic, no-cost solution for simple order taking. |
Each of these platforms offers a significant leap forward from a static Excel sheet, turning your order process from a manual chore into an automated, data-rich part of your sales engine. The key is to find the one that best fits where your business is headed, not just where it is today.
Common Questions and Quick Fixes
Even with a perfectly designed order form, a few common roadblocks can pop up. Let's walk through some of the questions I hear most often and get you the right answers.
How Can I Automatically Generate a Unique Order Number?
This is a classic one. For a straightforward solution that doesn't require any coding, you can create a number that combines the current date with a manual counter.
Try a formula like this: =TEXT(TODAY(),"YYYYMMDD")&"-001". The only catch is that you’ll have to remember to manually change the “-001” to “-002” for the next order. If you're looking for true, hands-off automation, the answer lies in a VBA macro that can increment a number stored in a hidden cell every time the form is saved.
Can I Send a Confirmation Email Directly from Excel?
Yes, you absolutely can, but this moves you into the realm of Visual Basic for Applications (VBA).
It involves writing a script that tells Excel to create and send an email through your Outlook client. The script can even generate a PDF of the completed form, attach it, and send it to the customer’s email address right from the sheet. It’s a powerful move, but it's definitely an advanced technique that requires enabling macros and can be tricky to set up just right.
Honestly, this is one of the key reasons businesses eventually graduate from Excel to dedicated form platforms. Automating communications is a heavy technical lift in a spreadsheet, but it’s a standard, built-in feature in modern tools.
Why Is My VLOOKUP Formula Showing an Error?
Ah, the dreaded #N/A error. In my experience, this is almost always caused by a small mismatch between the value you're looking up and the data in your source list.
The most common culprit is a tiny difference between the product name on the order form and the name in your master product list. Check for extra spaces at the beginning or end of a cell, typos, or other subtle formatting issues. Here’s a pro tip I always share: wrap your formula in the IFERROR function. It looks like this: =IFERROR(VLOOKUP(...), ""). This tells Excel to just leave the cell blank instead of displaying that ugly error message.
Ready to move beyond the limitations of spreadsheets? Orbit AI helps you create intelligent, high-converting forms that automate lead qualification and sync directly with your sales tools. Start building for free today and turn every form submission into a qualified opportunity.


